Ebase Security – User and
Group Maintenance
See
also: Ebase
Security Authorization
The Ebase
system is shipped with a built-in system for maintaining users and groups. This
is activated by the following line in UFSSetup.properties:
Ufs.userManager=com.ebasetech.ufs.security.authentication.EbaseUserManager
The
maintenance dialogs described in this document are only applicable when using
the supplied Ebase User Manager.
Fundamentals
All users
of the Ebase Designer must be authenticated. In addition, runtime users i.e.
users running Ebase forms, may also be authenticated. It is mandatory for all
runtime users of the Ebase Workflow System to be authenticated.
Groups are used
in conjunction with the Ebase Workflow System where they are used to control
the assignment of tasks to individuals or groups of individuals. If Ebase
Workflow is not being used, groups can be ignored.
Maintaining User
Definitions
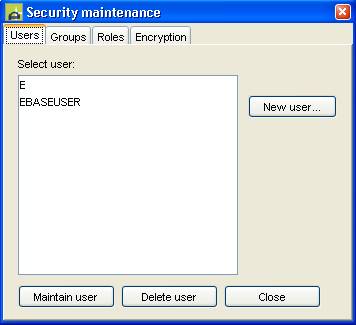
The user
maintenance dialog is accessed from the tools menu (Tools -> Maintain
security) then clicking the Users tab. This function is only available to users with the following
authorization:
(See Ebase Security Authorization for more
information)
|
Type: |
SECADMIN |
|
Name: |
USER |
|
Function: |
Write |
Note that function Read grants read-only access.
From this
dialog box you can choose to maintain an existing user by double clicking on a
user or clicking the Maintain User button, delete an existing user, or
create a new user.
Double-clicking
on a user presents a dialog where the user can be maintained.
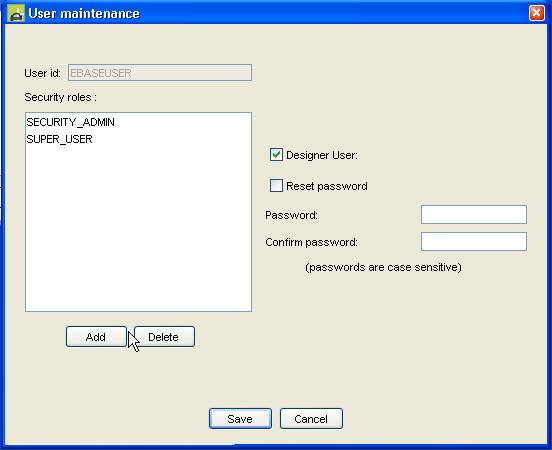
Security
Roles: defines the security roles associated with the user. These roles
contain authorizations that are used to control access to both the Ebase
Designer and runtime environments once the user has signed on. Use the Add
and Delete buttons to add or delete roles. Roles can also be associated
with groups – when a user signs
on, the names of all roles are determined using both user level roles and group
level roles. (See Ebase Security
Authorization for more information)
Designer
User: check this to grant access to the Ebase Designer.
Reset
password: check this and then complete password and confirm
password to reset a user’s password.
Password/confirm
password: used to set an initial password for new users or to reset the password
for existing users.
Groups:
provides display only information on groups of which the user is a member.
User/group relationships are maintained from the Groups tag.
Maintaining Group Definitions
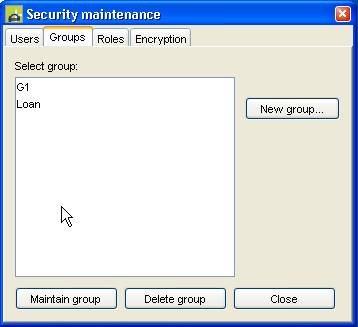
The group
maintenance dialog is accessed from the tools menu (Tools -> Maintain
security) then clicking the Groups tab. This function is only
available to users with the following authorization:
(See Ebase Security Authorization for more
information)
|
Type: |
SECADMIN |
|
Name: |
USER |
|
Function: |
Write |
Note that
function Read grants read-only access.
From this dialog
you can choose to maintain an existing group by double clicking on a group or
clicking the Maintain Group button, delete an existing group, or create
a new group.
Double-clicking
on a group presents a dialog where the group can be maintained.
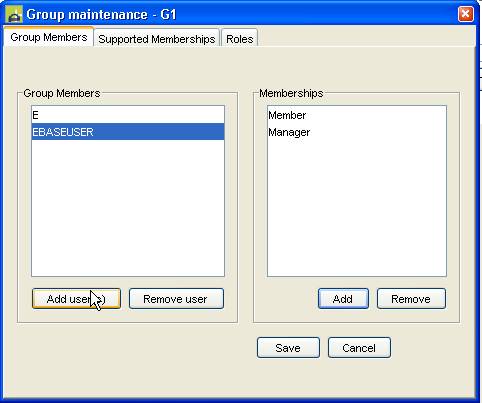
The Group
Members tab is used to add or remove users to or from the group. The
memberships for each user represent roles (roles is used here in
a general sense and should not be confused with Security Roles) that the
user can play within the group e.g. Manager or Team Leader. These
can be maintained by clicking on a user name in the Group Members panel,
then using the Add and Remove buttons in the Memberships
panel. Only those memberships defined using the Supported Memberships
tab can be added.
The Supported
Memberships tab is used to maintain a list of memberships which are
possible for the group.
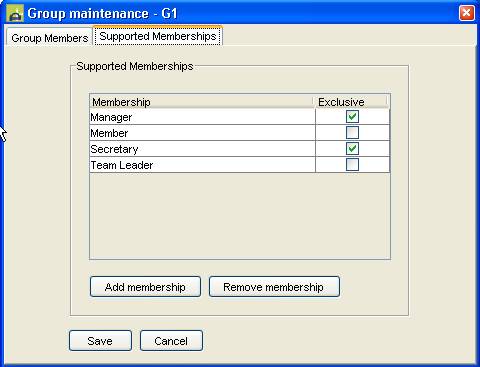
Use the Add
membership and Remove membership buttons to add or remove memberships.
When a group is initially created three default memberships are created:
Member, Manager and Team Leader. These can be removed if required and any new
memberships can be added.
The Exclusive checkbox indicates that only one member of the group is permitted to have this membership. This checkbox works together with the assignment expression dialog used by the Ebase Workflow System.
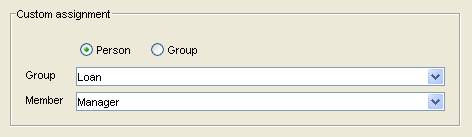
Selecting
the Person radio button indicates that a single person should be
assigned to the task. The system will only display memberships that have the exclusive
flag checked. Selecting the Group radio button indicates that there are
multiple people who could be assigned to the task. The system will only display
memberships that have the exclusive flag unchecked
The Roles tab is used to add security roles to the group. When a user signs on, the names of all roles are determined using both user level roles and group level roles for all groups of which the user has any sort of membership. This facility makes it possible to establish groups that are really composite roles i.e. a grouping of roles. Users could then be added to the group.
