Creating an Integration Resource from an Integration
Service
Creating an Integration Resource from an Integration
Service
Creating an Integration Resource from an Integration
Service using Tables
Making modifications to an Integration Service and
re-exporting to an Integration Resource
See also:
Introduction
Ebase supports the creation of an Integration Resource from an Integration Service. Follow the simple steps in the wizard described below to create an Integration Resource from the fields and tables within an Integration Service. Ebase recommends that when designing Integration Services, the resource should be created from the Integration Service as described here, rather than by creating the Integration Resource and importing the resource fields.
The wizard allows the Ebase designer to quickly create an Integration Resource. Use of the wizard allows the user to configure the following:
− Resource Name
− Integration Adapter Name
− Integration Operation Name (used to define the web service operation)
− The namespace to associate to the Integration Schema
− Request Fields and Table Fields
− Response Fields and Table Fields
− Field and Table mappings between the resource to the Integration Resource.
The Integration Resource is added automatically to the Business View associated to the Integration Service. If no Business View exists, then the wizard asks the user whether they wish to create a new one.
Creating an Integration Resource from
an Integration Service
An Integration Service can be exported by clicking the ![]() icon on the Integration Service toolbar. The
examples below show a simple export for ADD_BOOK Integration Resource that
contains fields to add a book. Note the fields will be already mapped to a
Database resource to handle the book (see working
with databases).
icon on the Integration Service toolbar. The
examples below show a simple export for ADD_BOOK Integration Resource that
contains fields to add a book. Note the fields will be already mapped to a
Database resource to handle the book (see working
with databases).
A wizard is displayed and guides the Ebase user through the configuration to create a new Integration Resource.
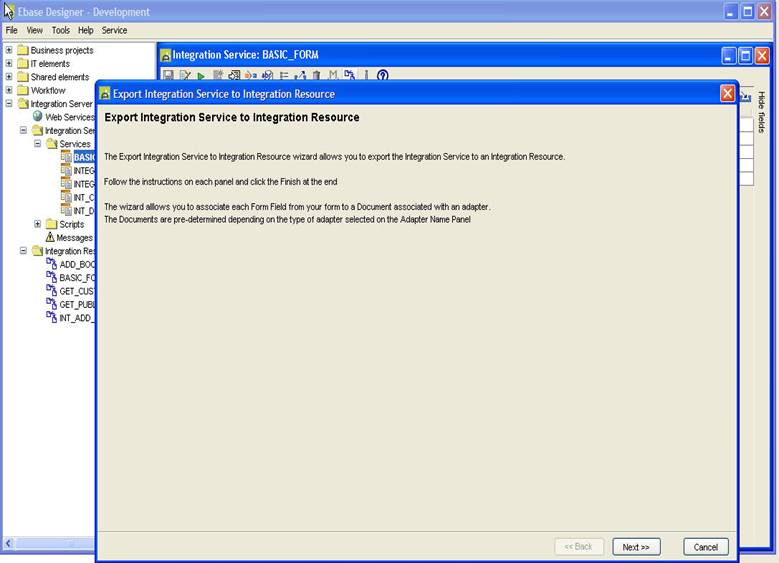
Click the ‘Next’ button and enter the Integration Resource name.
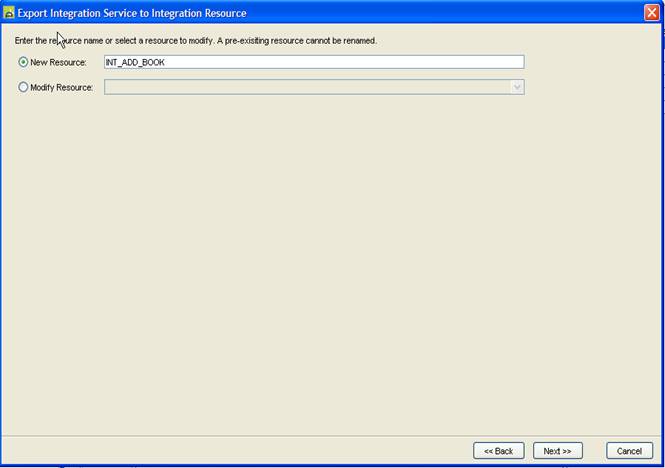
Click the next button. Note: The resource name must be unique
across all resources
(including DB Resource, etc.). If a resource of that name already exists, an
error message will be displayed. If this occurs, click OK and enter a different
Integration Resource name.
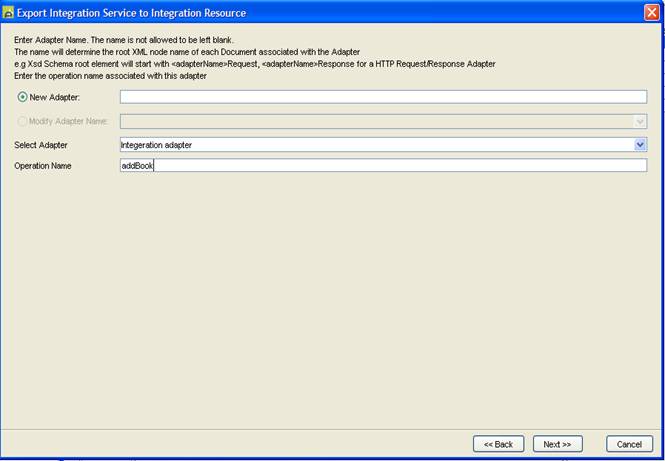
Enter the
name of the adapter - this is optional. If the adapter name is left blank, then
a default adapter will be created.
Enter the
operation name - this is mandatory as it defines the operation name published
in the Web Service.
Note: The Export Integration Service wizard only
supports exporting to an Integration Adapter.
Click the
‘Next’ button.
At the top of the panel is a Text field to configure the Target Namespace. The target namespace is inserted as the target namespace in the Schemas created from this wizard. The target namespace should be the name of the company publishing the web service and should conform to XML Namespaces specification, e.g. http://<your-company-web-address>.
All fields
are displayed with the ![]() icon and their field name at the root of the
Select Fields panel tree.
icon and their field name at the root of the
Select Fields panel tree.
The panel
displays a list of all available fields, tables and columns (tables and columns
are described in the next section) in the left hand pane. On the right hand
side is a tabbed pane with Request and Response Resource Fields tabs. Add the
fields to the relevant document where:
- Request Field data received from the external client call. A request document will be created in the integration resource by using the adapter name configured above + Request. If an adapter name is not entered then the default Request document name will be used.
- Response Field data returned to the external client call. A response document will be created in the integration resource by using the adapter name configured above + Response. If an adapter name is not entered then the default Response document name will be used.
Add the fields to the Request or Response by selecting the appropriate tab (document) and pressing:
>> Button adds field(s) to the selected document
<< removes field(s) from the selected document
It is possible to select multiple fields by holding the control key and selecting multiple fields or using shift key. Add or remove from a document by pressing the appropriate button.
In the example below, fields ISBN, TITLE, AUTHOR, DATE_PUBLISHED, EDITION and PUBLISHER are added to the Request (adds book to DB resource in Integration Service).
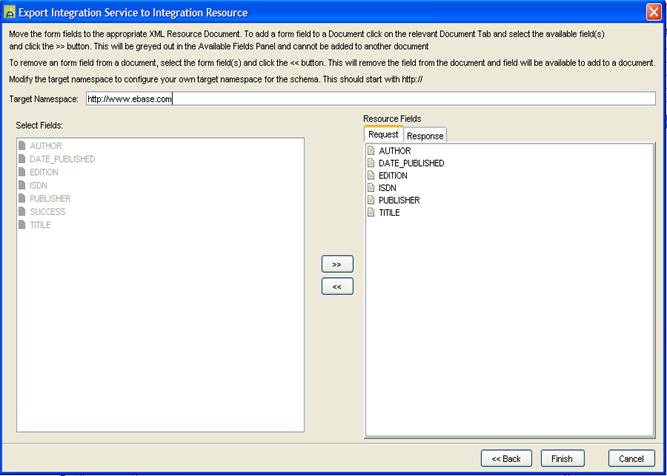
A field can only be used once for each resource in an Integration Service. When a field has been added to the Request or Response document it will be disabled in the Select Fields panel. When a resource field is removed from the Request or Response document, the field becomes enabled again in the Select Fields panel.
In the example below a single field SUCCESS is added to the Response. The success field value will be returned to the calling external application.
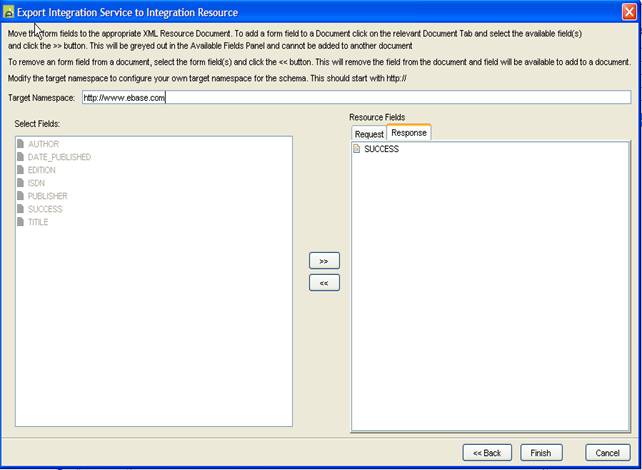
Click the Finish Button.
A new Integration Resource will be created and added to the Ebase Designer tree: Integration Server -> Integration Resources. In the example above ADD_BOOK resource is created. The ADD_BOOK Integration Resource panel will open and focus will be given to this panel.
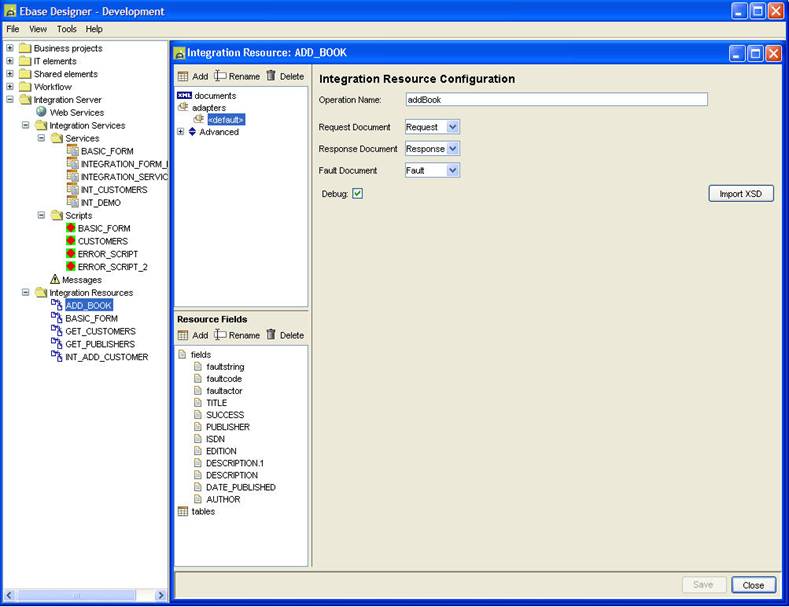
A Request and Response Schema is created for each of the Request and Response Documents in the Integration Resource. A standard SOAP 1.1 SOAPFault is created automatically for the Fault Document.
The schemas created use the field names from the Integration Service to create the element names for each schema type. Data types are automatically created based on the type of Integration Service Field.
e.g:
Field Type Character = xs:string
Field Type Integer = xs:int
Field Type Date = xs:date
Field Type Boolean = xs:boolean
etc…
The Request Schema generated for the above example:
<xs:schema attributeFormDefault="unqualified"
elementFormDefault="qualified"
targetNamespace="http://www.ebase.com/ADD_BOOK/Request"
xmlns:xs="http://www.w3.org/2001/XMLSchema">
<xs:element
name="Request">
<xs:complexType>
<xs:sequence>
<xs:element
type="xs:string" name="AUTHOR"/>
<xs:element
type="xs:date" name="DATE_PUBLISHED"/>
<xs:element
type="xs:int" name="EDITION"/>
<xs:element
type="xs:string" name="ISDN"/>
<xs:element
type="xs:string" name="PUBLISHER"/>
<xs:element
type="xs:string" name="TITILE"/>
</xs:sequence>
</xs:complexType>
</xs:element>
</xs:schema>
The Response Schema generated for the above example:
<xs:schema attributeFormDefault="unqualified"
elementFormDefault="qualified"
targetNamespace="http://www.ebase.com/ADD_BOOK/Response"
xmlns:xs="http://www.w3.org/2001/XMLSchema">
<xs:element
name="Response">
<xs:complexType>
<xs:sequence>
<xs:element
type="xs:boolean" name="SUCCESS"/>
</xs:sequence>
</xs:complexType>
</xs:element>
</xs:schema>
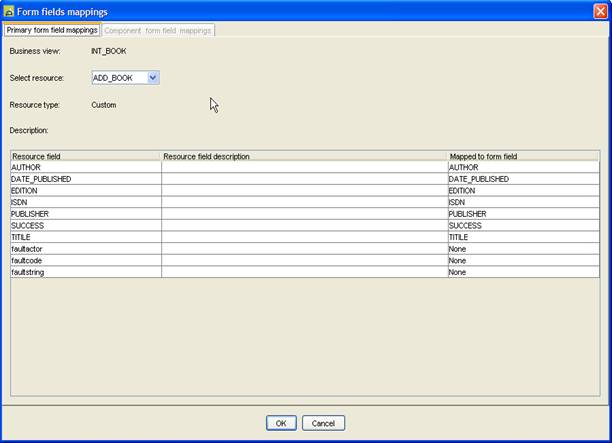
Field Mappings
Mappings between Integration Resource fields and Integration Service fields are automatically created. By selecting the Integration Service exported and clicking the mappings icon on the Integration Service toolbar you will notice all the fields are mapped. You can make any modifications in the mappings as required.
Creating an Integration Resource
from an Integration Service using Tables
Exporting an Integration Service containing a table is done in the same way as exporting a resource with fields. The only difference is that each table can only be mapped to a single resource, which in this case must be the integration resource. Therefore, when exporting an Integration Service containing a table it is recommended that the table is not already mapped to any other resource.
When there is a requirement to map a table to two resources e.g. read data from a database, then insert into the XML response document, this must be achieved by creating two tables, each mapped to a single resource, then copying the data contents from one table to the other using the FPL copytable command or the API Table.replaceTable() method.
Add the required table(s) to the Integration Service and
click the ![]() icon in the toolbar.
icon in the toolbar.
Enter the new resource name and click the Next Button
Enter the adapter name (if applicable), operation name and click the Next button.
Note:
Any table fields in the Select Fields Panel are displayed as two levels:
−
Table nodes ![]() are situated at the root of the Select Fields
tree and displays the name of the Table on the Integration Resource.
are situated at the root of the Select Fields
tree and displays the name of the Table on the Integration Resource.
−
Column nodes ![]() are situated underneath their associated
tables and they display the name of the column in the table.
are situated underneath their associated
tables and they display the name of the column in the table.
Select the table name or column fields and click the >> button to add the table/columns to the selected Request or Response Document.
Once a table or column is added to the Request or Response document, it will become disabled to indicate it has already been selected for export.
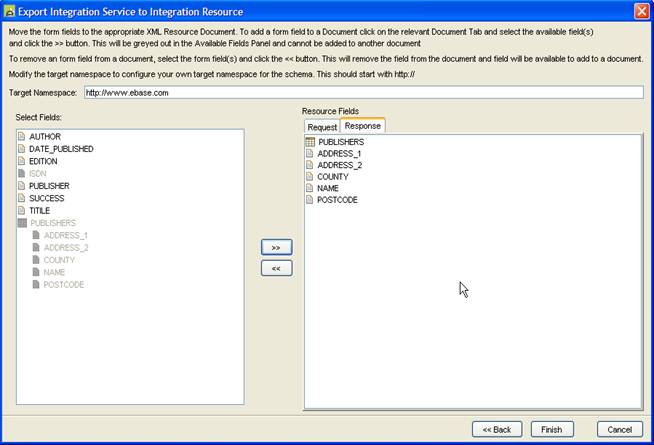
Click the Finish Button.
The above example creates an Integration Resource to return all Publishers of a particular book using an ISBN number.
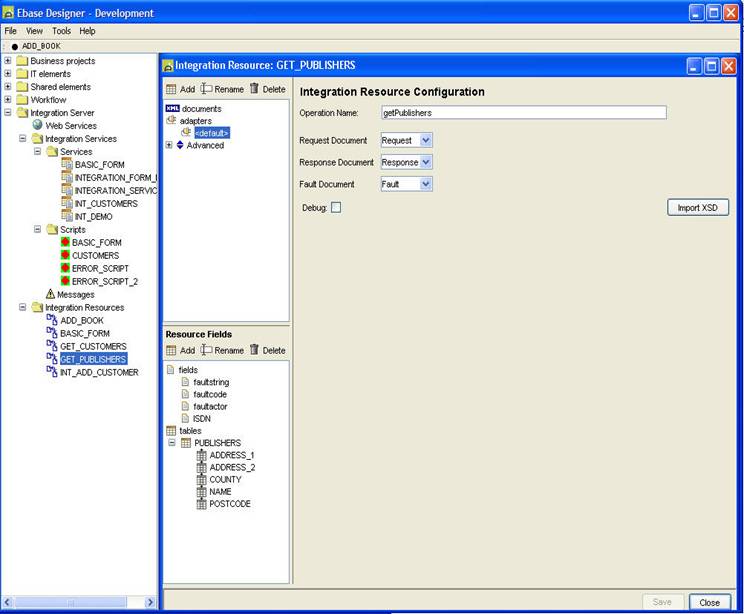
Table types created in the Schema are set to unbounded.
The Response schema generated from the above example containing a table (PUBLISHERS):
<xs:schema attributeFormDefault="unqualified"
elementFormDefault="qualified"
targetNamespace="http://www.ebase.com/GET_PUBLISHERS/Response"
xmlns:xs="http://www.w3.org/2001/XMLSchema">
<xs:element
name="Response">
<xs:complexType>
<xs:sequence>
<xs:element
type="res:PUBLISHERS" name="PUBLISHERS"
xmlns:res="http://www.ebase.com/GET_PUBLISHERS/Response"/>
</xs:sequence>
</xs:complexType>
</xs:element>
<xs:complexType
name="PUBLISHERS">
<xs:sequence>
<xs:element
name="PUBLISHERS" maxOccurs="unbounded">
<xs:complexType>
<xs:sequence>
<xs:element type="xs:string"
name="ADDRESS_1" minOccurs="0"/>
<xs:element type="xs:string"
name="ADDRESS_2" minOccurs="0"/>
<xs:element type="xs:string" name="COUNTY"
minOccurs="0"/>
<xs:element type="xs:string" name="NAME"
minOccurs="0"/>
<xs:element type="xs:string" name="POSTCODE"
minOccurs="0"/>
</xs:sequence>
</xs:complexType>
</xs:element>
</xs:sequence>
</xs:complexType>
</xs:schema>
Making modifications to an
Integration Service and re-exporting to an Integration Resource
If an Integration Service is modified by adding new fields or removing fields, it is possible to re-export that Integration Service to modify an existing Integration Resource.
Add or remove the fields from the Integration Service.
Click the ![]() button on the Integration Service toolbar to
display the Export Integration Service to Integration Resource wizard.
button on the Integration Service toolbar to
display the Export Integration Service to Integration Resource wizard.
Click the Next button.
Select the Modify resource radio button.
From the drop-down list, select the resource to modify.
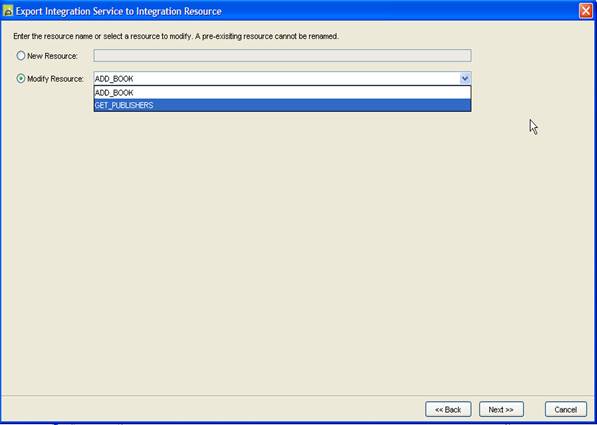
Click the Next button.
It is not possible to edit the adapter name. It is possible to edit the operation name.
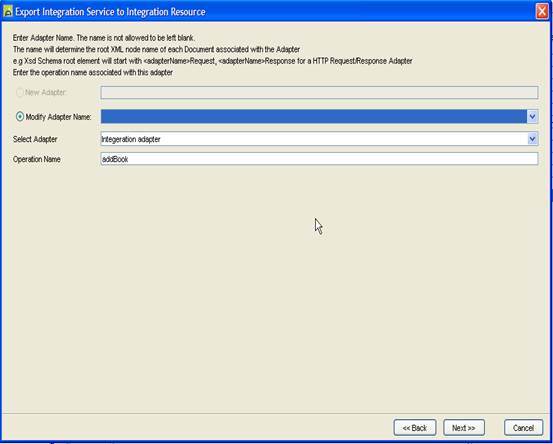
Select which adapter is to be modified and edit the operation name if applicable. If the Integration Adapter is a default adapter name, then the name in the drop-down list will be blank.
Make any modifications to the operation name for the adapter and click the Next Button.
The next panel displays all the field available (enabled) to be added to the resource field’s panel. Any fields that have been removed from the Integration Service panel are automatically removed from either the Select Fields panel or Resource Fields panel. Any fields that have already been mapped in the Integration Resource being modified will be disabled and will not be available to select.
In the example below the DESCRIPTION field has been added to the Integration Service.
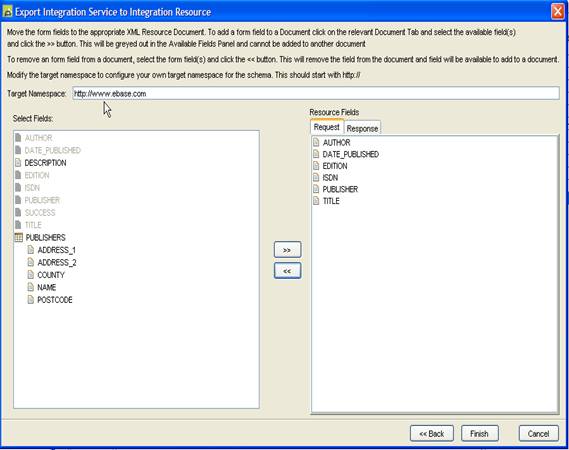
Add the fields to or remove the fields from the Resource Fields Panel by using the >> or << buttons and click Finish.
The Integration Resource is modified automatically by adding and removing the Resource Fields related to the Integration Service. The modified Integration Resource opens automatically when the finish button is clicked and focus will be given to the Integration Resource Panel.
The modified mappings are inserted into the Integration Resource.
The same is applicable to modifying a resource with Tables.
Designer Note: If an Integration Service and/or
Integration Resource is modified then the Web Service
must be redeployed before the changes will take effect. See Web Services section for more details
on deploying web services.