Configuring Ebase Designer
Configuring
the start designer script
See also: Supported Configurations
Prerequisites
See Supported Configurations for hardware and software prerequisites for running Ebase Designer.
Designer File
Structure
Ebase
Designer consists of a single folder UfsClient with
the following structure:
UfsClient...
start_ebase_designer.bat
bat file to start Ebase Designer
images...
contains images
lib....
contains jar files
properties
contains preferences specific to each user
The start_ebase_designer.bat file must be customized with the configuration information to access the server as specified below. This is the only customization normally required.
Configuring the
start designer script
The start_ebase_designer.bat file in
the UfsClient folder contains a number of
parameters that enable the designer to communicate with the server and these
parameters must correspond with the configuration options of the application
server under which Ebase is running. The parameters are specified as SET
commands at the top of the .bat file.
|
SERVER_HOST |
The
hostname or IP address of the server (this parameter must be specified) |
|
SERVER_PORT |
The HTTP port
of the server (default is 80 if not specified) |
|
SERVER_WEBAPP |
The
server web application context for the Ebase web application (default is ufs
if not specified) |
For configuration of proxy servers, see below.
Designer Preferences dialog
The designer appearance can be customized
using the Designer Preferences dialog (File -> Preferences):
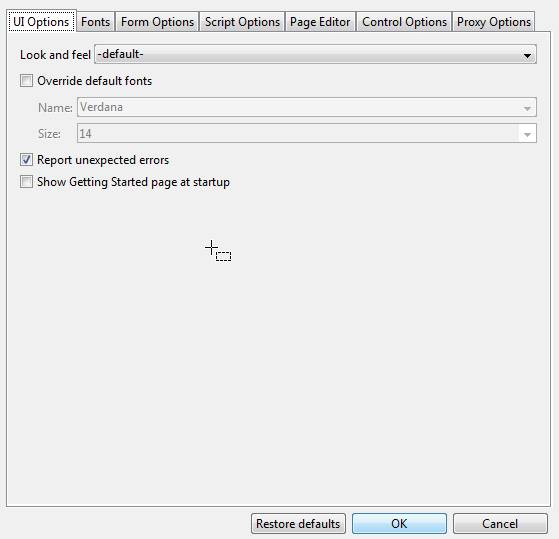
UI Options Tab
lookAndFeel
:
|
default |
Ebase supplied look and feel (from
Jgoodies) |
|
Metal |
Java default look and feel |
|
CDE/Motif |
Look and feel compatible with
XWindows |
|
Windows |
Windows compatible look and feel |
|
Windows Classic |
Windows Classic compatible look
and feel (this option may not be visible) |
Override default fonts: enables font name and size to be entered below. This is the default font used throughout the Designer; note that additional fonts can also be specified using the Designer Fonts tab.
Name: the font used by the Designer
Size: the font size used by the Designer
Report unexpected errors: when checked, any errors in the Designer will result in a popup window as shown below:
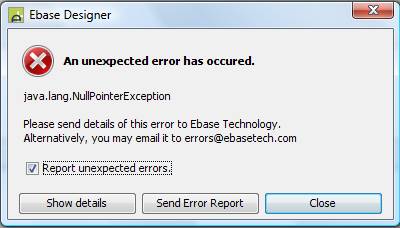
Click Show details to display the error.
Click Send Error Report to send the error to Ebase. Note that this requires internet access.
Uncheck Report unexpected errors to suppress display of this dialog. Check this option if this dialog is showing repeatedly.
Show Getting Started page at startup: Getting Started page with links to tutorials and the Ebase Xi Resource Centre is shown each time the designer is started.
Fonts Tab
Note that the default font used by the Designer is specified using the UI Options tab.
Script Dialog Font: the font name and size of the font
used by the script editor
Debug Window Font: the font name and size of the font
used to display the form execution log
Form Options Tab
Language: the default language used for the designer.
This language is used when configuring texts and is the default language used
for form submission from the designer.
Presentation Template: specifies the default presentation template
to be associated with all new forms and components.
Browsers: supports the configuration of any number of
browser clients. The browser can be selected when a form is run when the following
flag Display settings when launching forms is checked.
Display settings when launching
forms: when checked, the system
will present an additional panel when submitting forms; this panel supports the
specification runtime language and browser.
New Forms use
Script Options Tab
Preferred Script
Language: sets the preferred server-side
scripting language.
Page
Editor Tab
Edit the zoom options displayed in the Form Editor WYSIWYG View.
· To add a new entry, click the + button.
· To delete an entry, select it then click the – button.
· To edit an existing entry, double click on it.
Entries must be numeric and end with %.
Window Dimensions
Edit the window dimensions displayed in the Form Editor WYSIWYG View.
· To add a new entry, click the + button.
· To delete an entry, select it then click the – button.
· To edit an existing entry, double click on it.
Entries must be in the format <number>x<number>.
Add following controls
to new pages
Select any controls that should be automatically added to new form
pages:
·
Page Panel Control – contains page level
header and trailer texts.
·
Page Navigation Panel Control –
contains Ebase page sequencing buttons and save restore buttons
Compatibility note!: adding both these controls provides equivalent functionality to Ebase Version 3.4 and earlier.
Control Options Tab
When adding a control to a page:
Link to the
Presentation Template’s default Property Set: when this option is checked, each new control
added to a page will be automatically linked
to the control’s default Property Set, if specified, in the Presentation
Template. When this option is not checked, the default Property Set, if
specified is loaded. See Property Sets for more information on linking vs.
loading.
Components:
Enable Property Set
linking: when this
option is checked, controls within components can be styled by linking them
with a Property Set in the associated Presentation Template. When the component
is inserted/deployed to a form, the linkage to the
Property Set is maintained: the designer should ensure that a Property Set with
the same name is available in the form environment or any styling will be lost.
When this option is not checked, the linking option is not available when
designing a component. See Property Sets for
more information on linking vs. loading.
Designer Proxy Options Tab
This tab allows specification of a proxy server to be used for all Http connections made from the Designer. This includes connection to the Ebase server and the import of wsdl and xsd files in the Web Services and XML resource respectively.
In the event that a proxy server is required to access the Ebase Server, it will not be possible to start the Designer to reach this dialog. In this case, the properties file preferences.properties in folder UfsClient/properties can be edited to add the proxy properties shown above. The corresponding property names are:
httpProxyHost
httpProxyPort
proxyRequiresAuthentication (should specify true or false)
httpProxyUsername
httpProxyPassword
Designer Proxy Bypass Setting
In the event that the Designer does not need a proxy to access the Ebase
Server, but the Designer does need a proxy to access other networks (e.g the
internet), then the following system property requires configuring in the
Designer startup properties or start_ebase_designer.bat file:
-DhttpNonProxyHosts=”localhost|127.0.0.1”
This setting configures the designer to access servers that do not
require access through a Proxy. Add the server name to the end of the
–DhttpNonProxyHosts line, separated by a |. Also note that the server names
specified between double quotes.
Example:
-DhttpNonProxyHosts=”localhost|127.0.0.1|192.168.1.1|ebaseserver”
If the Designer is started using designer.exe, the properties file designer.vmoptions should be edited. If
the designer is started using start_ebase_designer.bat,
then this batch file should be edited. Both files can be found the the
UfsClient folder.