Client API Tutorial
Adding a Client
Callable Function
Add jQuery and
jQueryUI Libraries to the form
Setting the Panel
to be a widget
Setting up the
Field Control’s input to be an Autocomplete input
Creating the
Source for the Autocomplete Widget
See also: Client API Guide, Client API Reference, Client Javascript and Rich Client Features, Designing Forms
Introduction
The aim of this tutorial is to take you through the steps needed to use the Client API to communicate directly with Ebase Xi running on the server from a web page. It uses many of the techniques for creating a rich client, which can be seen in the Client Javascript and Rich Client Features (and in its companion tutorial) and this tutorial assumes that you are comfortable with these concepts.
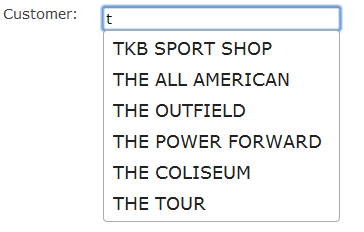
We will design a very simple form with a jQueryUI Autocomplete Widget. The Autocomplete widget enables users to quickly find and select from a pre-populated list of values as they type (see the jQueryUI website for more information). Here we will use it to present a list of possible customer names that start with the characters the user types, so will narrow down the list of possible names the more the user types in. The full list of customer names lives in a database which Ebase Xi running on the server is connected to. We will use the Client API to fetch the list of names that should appear in the list at any point.
The result should be something like this:
Creating the Form
Designing the static Page
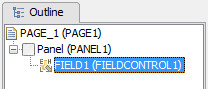
Create a new Form, add a Panel Container to it and give the panel an empty layout type. Add a Field Control to the Panel. Double click on the label of the Field Control in the WYSIWYG panel and change it to: Customer:
The Outline view should now look like this:
Adding a Client Callable Function
The customer names live in a table in a database connected to Ebase Xi. We want to provide a way of accessing these names from a browser - this is where the Client API comes in. It is an interface between the browser and the server and the executeFunction function allows the browser to execute a Client Callable Function on the server, with full access to the user’s current Form state and return the result of this execution.
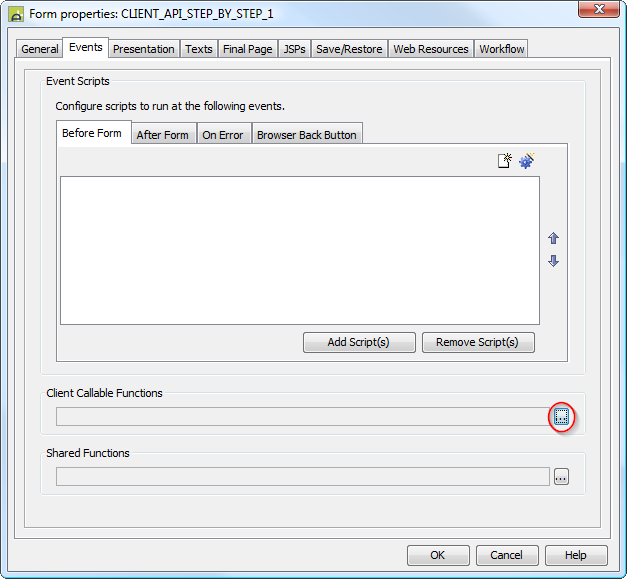
Open the Form Properties Dialog and press on the Events tab, and click on the … button to configure Client Callable Functions.
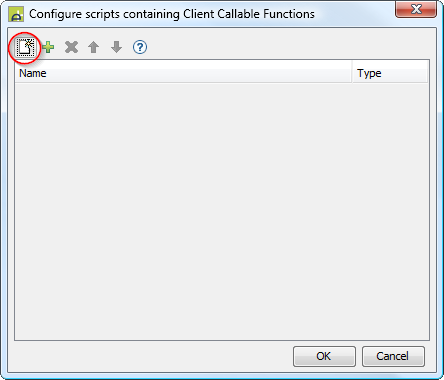
And then click on the Create a New script button on the dialog that pops up.
Enter a name for the script when prompted and then this new script will open in the Designer ready for editing. Delete the contents of this script and paste all of the following code into it.
|
importPackage(com.ebasetech.xi.api); importPackage(com.ebasetech.xi.services); /** * Get a list of customer names which start
with the given term * * @param term - string - search for
customers starting with this term */ function
getFilteredCustomers(term) { // These variables configure a connection, table
and column name we will use to retrieve a list of customer names. //
Ebase ships with this database and will connection to it configured.
If you have removed this connection or //
changed table names, you can substitute suitable names in here. var connectionName =
"EBASE_SAMPLES"; var table = "CUSTOMER"; var columnName = "NAME"; // We want to search for all names starting
with the term regardless of case. // So we will search for the upper cased
version of the term //
(and will compare to the customer name when it has been convered to
uppercase) // The '%' at the end says we don't care
about the characters after the term (i.e. match anything after it). var filterTerm = term.toUpperCase()+'%'; var con = system.getDatabaseConnection(connectionName); var stmt; var rs; try { // We build up the statement here. We are
selecting the names from the database table //
where the uppercase version of the name starts with the filterTerm
(the uppercased term that was passed in). stmt = con.prepareStatement("select
" + columnName + " from " + table + " where
UPPER("+columnName+") like '" + filterTerm + "'"); rs = stmt.executeQuery(); // create an array for the customer names var names = []; // go through the result set and add each
name to the names array while (rs.next()) { names[names.length] =
rs.getString(columnName); } // finally return the array return names; } finally { // It is very important to close any open
result sets, statements and connection in this manner //
otherwise there will be a resource leak. if(rs) rs.close(); if(stmt) stmt.close(); if(con) con.close(); } } |
Lets have a quick look at what this code is doing. Firstly we have defined a function called getFilteredCustomers which takes in a ‘term’ parameter. The function expects this to be a string containing the sequence of characters that the customer names must begin with. The function sets up a connection to the database and performs a select statement on the CUSTOMER table querying for all the character names starting with the given sequence of characters. It then iterates over the result set of the database query and adds each name to an array. When the function has been through all the names in the result set it returns that array.
Adding Dynamic Functionality
Here’s where we convert the Field Control into a dynamically updating Autocomplete Widget and use the Client API to call the Client Callable Function for the list of names it should display at any given time.
Add jQuery and jQueryUI Libraries to the form
The AutoComplete widget is a jQuery UI widget so we need to add the appropriate libraries to the Web Resources of the Form so they are available to the browser.
Create an external StyleSheet for the jQuery UI:

Then in the Web Resources tab of the Form Properties Dialog add this external stylesheet and two external client scripts:
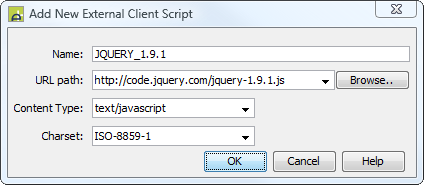
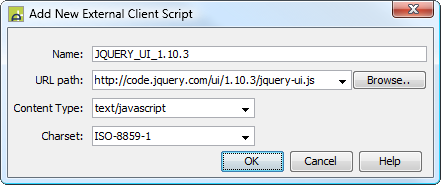
Make sure that JQUERY_1.9.1 is ordered in the Client Script list before (higher) then JQUERY_UI_1.10.3.
Setting the Panel to be a widget
Add a Class Locator to the panel control of ui-widget. This is a jQuery UI styling class that tells it that this element (and its child elements) is a widget and so the jQuery UI will style it as such (this styling is in the external style sheet we added to the Web Resources in the Form Properties).
Setting up the Field Control’s input to be an Autocomplete input
Open the Html Element Properties for the Field Control and to its input (via the Editor Input tab) add an Id Locator called customer.
In the same dialog add a ready jQuery Custom Event Handler with the following code:
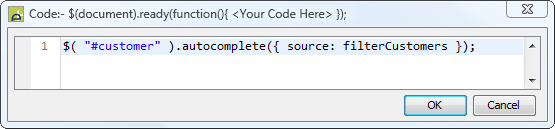
This uses jQuery to find the element with the customer id – the Locator we just added to the input of the Field Control – and calls the jQuery UI autocomplete function on it. This function will instruct jQuery UI to turn the input of the Field Control into an autocomplete input using a source called filterCustomers.
Creating the Source for the Autocomplete Widget
The source option we specified in the autocomplete function defines the data it should use (in our case the list of customer names) and can be, according to the jQueryUI Autocomplete API: an array of strings, a string or a function. The source is interrogated each time the autocomplete widget detects a change (e.g. when a user types into it) so we can use this to change the list of names for it to display based on what the user has already entered into the input field.
The jQueryUI API further states that when using a function to represent the source of the autocomplete widget it should be of the form:
Function(Object request, Function
response(Object data))
A request object is passed in which contains a single property named term and this contains a string of characters the user has already entered. It also passes in a response parameter, which is itself a function that expects some data to be passed in. This data should be an array of names that should be displayed taking into account the characters the user has already entered.
When we wrote the jQuery ready Custom Event Handler we named the source filterCustomers, so lets defined a function called that now.
First create a Client Script (a script which is available to code running in the browser – like the jQuery Custom Event Handlers) and then add the code as shown below.
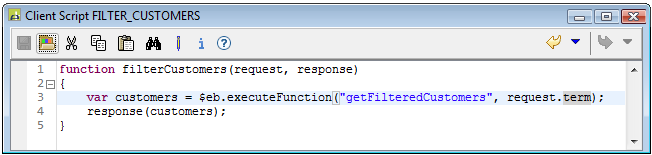
Here we have defined the function filterCustomers which accepts 2 parameters, request and response and use the Client API executeFunction method ($eb.executeFunction) passing in the name of the Client Callable Function we created earlier and the string containing the sequence of characters the user has typed in from the request parameter. The Client Callable Function we wrote earlier gets executed, builds an array of appropriate customer names by looking them up in the database and returns the array back to to the Client API. The Client API in turn passes it back here where we assign it to the variable customers. We then return this variable back to the calling code - the jQuery UI Autocomplete widget.
Add this client script to the Form via the Web Resources tab on the Form Properties Dialog.
Run the Form and enter the letter t into the input box and you will now see a list of names drop down similar to the ones in the introduction.