Form Properties
It is possible to set default values for many of these form properties in the presentation template associated with a form. The default properties are configured in the Form section under Property Sets within the Presentation Template Editor.
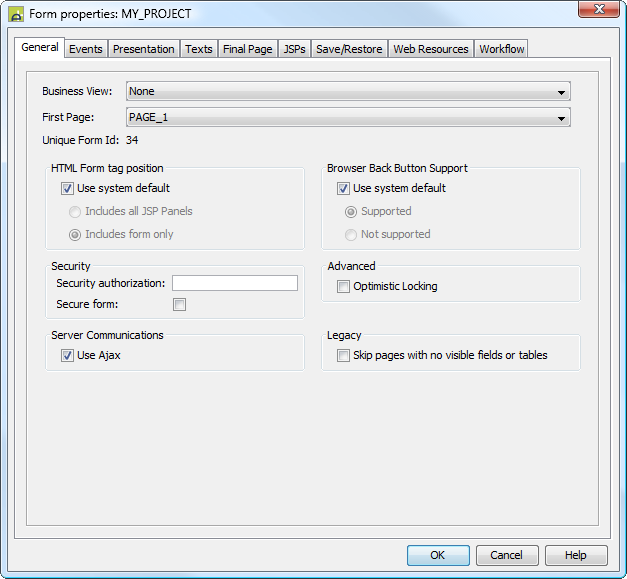
General tab
|
Property |
Description |
|
Business View |
the Business View associated with this form. This is the link between the form and all the external resources (e.g. databases, email services, etc.) accessed by the form. Double-clicking on the Business View will open the Business View editor. (See Understanding Ebase Integration and Working with Business Views for more information) |
|
First Page |
the form's first page. The dropdown list contains all pages of the form. |
|
Unique Form Id |
The unique id of the form. This can be used when scanning documents containing barcodes produced from online forms. |
|
HTML Form Tag Position |
specifies the position of the HTML form tag as follows: · Use system default - option as specified in UFSSetup.properties parameter Ufs.globalHtmlForm is used. · Includes all JSP Panels - the form tag includes the Ebase form and all included JSP or HTML panels. · Includes form only - the form tag includes just the Ebase form and not any included JSP or HTML panels. Use this option if you need to include your own <form> tags in included JSP or HTML files. See the description of parameter Ufs.globalHtmlForm in UFSSetup.properties for further information. |
|
Browser Back Button Support |
Specifies whether the user can use the browser back button. See back button support for more information. |
|
Security authorization |
supplies the name of the security authorization used to check whether users have access to this form. (See Ebase Security Authorization for more information) |
|
Secure form |
When checked, the system will use the secure https protocol for all communication between the end user and the Ebase Server. You will need to consult the documentation for your web server and application server to configure them to enable https. (See Secure Forms for more information) |
|
Optimistic Locking |
Applies to database updates only. When checked, the system will check that the record about to be updated has the same values as it did when it was read from the database using a fetch command. This check is applied only to mapped fields as Ebase is not concerned with the state of any other fields on the database record. If the values are unchanged then the update is performed, otherwise command status is set accordingly. (See update command in FPL script command syntax or the API DatabaseResource.update() method) Unchecked is the default setting and then the update is performed without any checks. Optimistic locking is supported only for update of a single database record using the update command/method – update of multiple records using updatetable is not supported. |
|
Use |
When checked, the system will use |
|
Skip pages with no
visible fields or tables |
This is a legacy setting and is generally not applicable for new forms. When checked, a page is not displayed when it contains no visible fields or tables (either they don’t exist or they are hidden). All other controls are ignored when making this determination. The page configured as the next page is shown instead. When unchecked, a page is always displayed. |
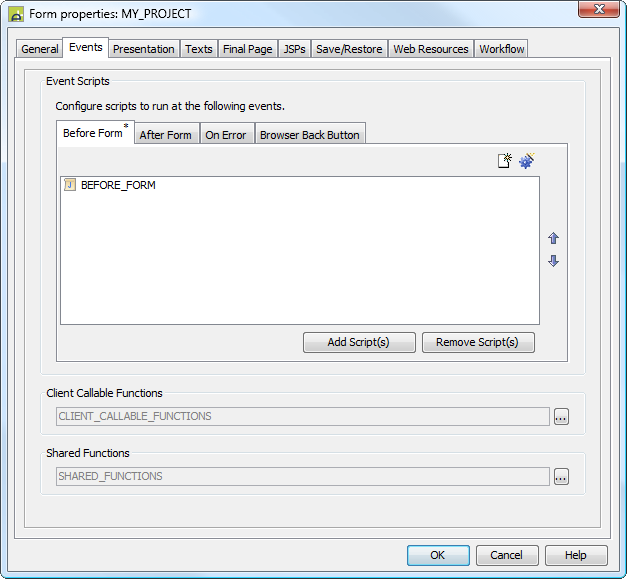
Events tab
|
Property |
Description |
|
Event Scripts |
This tabbed section allows scripts to be associated with or removed from the various form level events. (See Understanding Ebase Events). |
|
Client Callable Functions |
Here Client Callable Functions can be added, removed to the form and ordered with respect to one another for use by the Client API. See Working with the Client API for more information. |
|
Shared Functions |
Functions that can be used by all Event Scripts as well as Client Callable Functions can be added, removed to the form here and ordered with respect to each other. See Shared Functions for more details. |
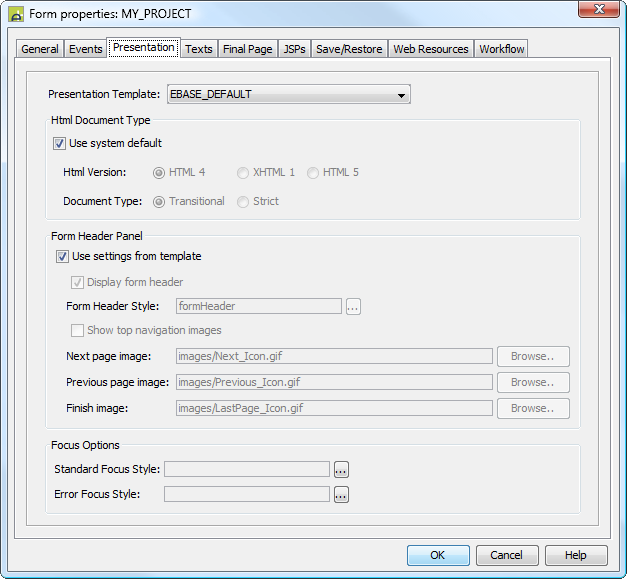
Presentation tab
|
Property |
Description |
||||||||||||||
|
Presentation template |
The presentation template associated with this form. This controls the look and feel of the form, e.g. images, fonts, font sizes, colors, etc. in the browser. Double-clicking on the template name will open the presentation template editor. (See How Style is Applied and Working with presentation templates for more information) |
||||||||||||||
|
Html Document Type |
These settings control the browser output rendered by the system:
|
||||||||||||||
|
Contains options to configure the form header text panel. The form header text is a single text that can be displayed at the top of each page. The text is configured in texts tab or by double clicking on the form header text in the WYSIWYG panel.
|
|||||||||||||||
See Controlling Browser Focus for more information on these options. |
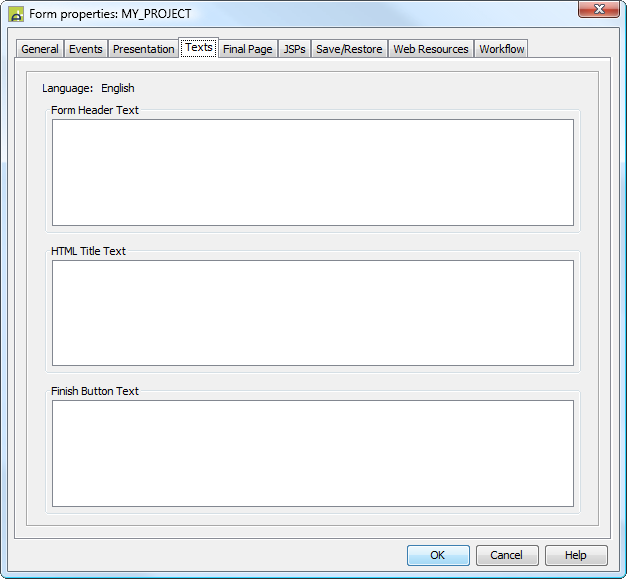
Texts tab
This allows you to change the form level texts. To view and maintain all language texts in the same window you can click the Maintain language texts button on the form toolbar. Single texts can also be changed by double clicking on the text in the WYSIWYG view.
|
Property |
Description |
|
Form heading text |
The language-dependent form header text displayed at the top of each page. See form header panel options in the presentation tab. |
|
HTML title text |
The language-dependent text displayed in the browser title bar. This text should always be supplied to make the form accessible to disabled groups. (See Web Accessibility - Forms Designer considerations) |
|
Finish button text |
The language-dependent text displayed on the finish button |
Final page tab
This allows you to set attributes for the form’s final page - this special page is displayed when the user clicks the special Finish button and form processing has ended (click here for further details).

|
Property |
Description |
|
Return Button URL |
Specifies the URL that will be linked to when the user presses the return button . |
|
Return Button text |
The language-dependent text to be displayed on the return button. |
|
Page style |
The CSS class and style applied to the BODY tag of the final page. Style configured here is applied to the entire page contents including surrounding JSPs. |
|
Page content style |
The CSS class and style applied to the page content. Style configured here is applied to all content excluding the surrounding JSPs. |
|
Containing table
style |
The CSS class and style applied to the TABLE tag of the final page. All content of the final page is included in this table excluding the surrounding JSPs.. |
|
Heading text style |
The CSS class and style applied to the final page heading text. |
|
Info text style |
The CSS class and style applied to the final page information text. |
|
Messages style |
The CSS class and style applied to any final messages. |
|
Return button
style |
The CSS class and style applied to the return button. |
|
Final page heading text |
The language-dependent text to be displayed at the top of the final page. |
|
Final page
information text |
The language-dependent text to be displayed below the final page heading text on the final page. |
To view and maintain all texts in the same window you can click the Maintain language texts button on the form toolbar.
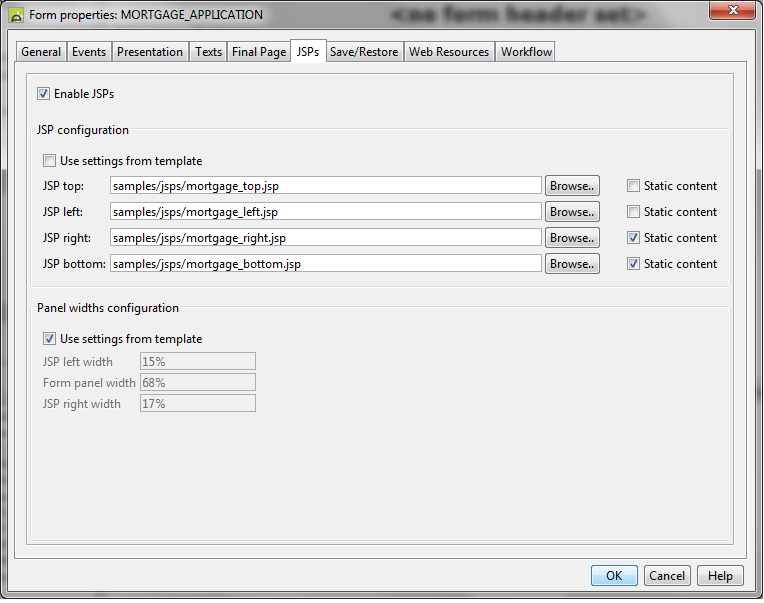
JSPs tab
This tab allows you to specify the file locations of the surrounding JSPs. The locations specified are relative to the document root of the Ebase web application. JSPs specified here override any default values configured for form default properties in the form’s presentation template, and can be overridden by specifying values for the Page Control properties for individual pages. Click here for priorities of surrounding JSP configuration parameters.
Note also that additional JSPs can be included at any point on a page using an Include Control.
|
Property |
Description |
|
Enable JSPs |
When checked, each form page is surrounded by up to 4 JSPs – see surrounding JSPs; the form page and JSPs are written using HTML <table> tags. When unchecked, JSPs are disabled and the form page is written using an HTML <div> tag. |
|
Top JSP |
The file location of the top JSP relative to the document root of the Ebase web application. Only files within the Ebase web application can be included. |
|
Left JSP |
The file location of the left JSP relative to the document root of the Ebase web application. Only files within the Ebase web application can be included. |
|
Right JSP |
The file location of the right JSP relative to the document root of the Ebase web application. Only files within the Ebase web application can be included. |
|
Bottom JSP |
The file location of the bottom JSP relative to the document root of the Ebase web application. Only files within the Ebase web application can be included. |
|
Static content |
This checkbox applies only when Ajax
communication is enabled. When checked for a JSP, the JSP is not
refreshed when a page is redisplayed e.g. when an event such as a button
click, hyperlink or field immediate validation results in the same page being
redisplayed. Note that JSPs are always refreshed
when moving to a different page or when |
|
Panel widths configuration |
|
|
Use settings from
template |
When checked, the following width settings are taken from the Form Property Set in the presentation template associated with the form. |
|
JSP left width |
The width of the table cell used to contain the left JSP |
|
Form panel width |
The width of the table cell used to contain the rendered form output |
|
JSP right width |
The width of the table cell used to contain the right JSP |
Save/Restore tab
This tab allows you to specify all attributes associated with the Ebase save/restore feature.

|
Property |
Description |
|
Save/restore enabled |
This is the master switch to enable or disable the feature for this form. |
|
User to supply password |
If this option is selected, the user will be prompted to supply a password when saving work. The same password must be used for the corresponding restore. |
|
Client cookie lifetime |
this sets the maximum number of days in which the user can restore saved work. |
|
Save text |
The language dependent text to be displayed in the save button. |
|
Restore text |
The language dependent text to be displayed in the restore button. |
|
Save info text |
This language dependent text will be displayed at the top of the save popup window box. |
|
Restore info text |
This language dependent text will be displayed at the top of the restore popup window box. |
To view and maintain all texts in the same window you can click the Maintain language texts button on the form toolbar.
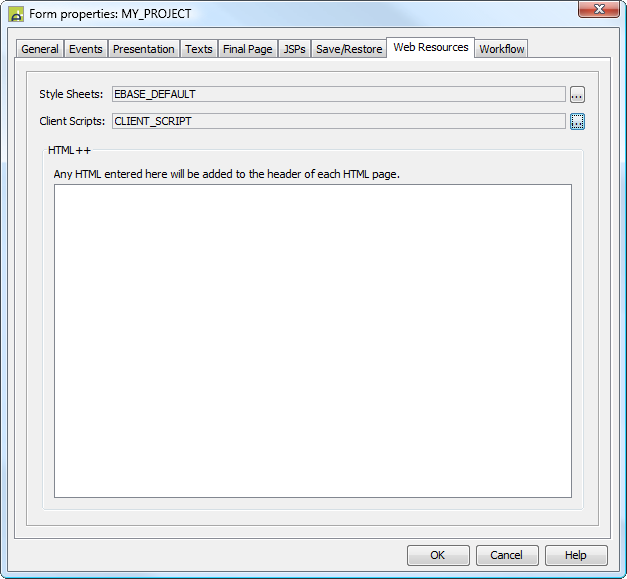
Web Resources tab
See Working with Web Resources for more information on the properties that can be configured in this tab.
|
Property |
Description |
|
Style Sheets |
Associates Style Sheets with the form and manages any inherited from the Presentation Template. Displays the Style Sheet Configuration Dialog. |
|
Client Scripts |
Associates Client Scripts (including External Scripts) with the form. Can also manage any Client Scripts inherited from a Presentation Template. Displays the Client Script Configuration Dialog. |
|
Html++ |
Additional HTML can be added to the HEAD section of the generated output for each page. This is in addition to any HTML configured in a linked Presentation Template. |
Workflow tab
This tab displays the in and out parameters and the completion states for workflow.